One of the most annoying things on the Windows operating system is the automatic updates, which just slows down everything and they take forever to download, right?
Luckily, there are some things that you can do in order to stop them.
Out of the box, Windows 11 automatically checks and installs updates without your permission, and sometimes, they are just unnecessary.
The good thing though is that Windows allows you to pause these updates for a single week.
How can you do it?
Below, we are going to list down some things that you can do in order to stop automatic updates on Windows 11.
First step:
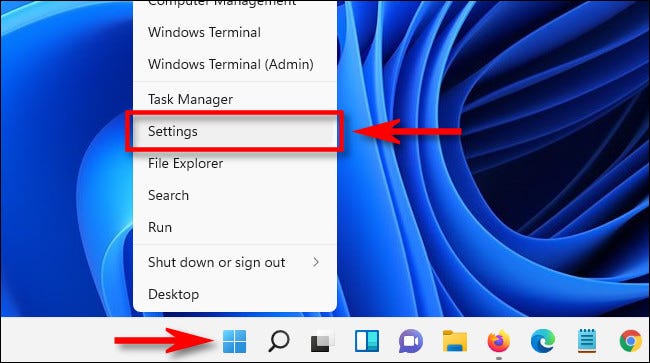
The first thing that you would have to do is open the Settings application on your Windows 11. You can do this by simply pressing Windows + I on your keyboard or can right click the Start button in your task bar and select Settings in the menu that appears.
Second step:
The second thing that you would have to do is click Windows Update, which would be available in the side bar.
Third step:
The third thing that you would have to do is click More Options in the Windows Update Settings.
Fourth step:
The fourth thing that you would have to do is hit the “Pause for 1 Week” button that is in More Options. This should pause your updates.
Important note: Once you set the Windows Update Settings to Pause for 1 Week, the automatic updates are going to be disabled for 1 week. This means that once that time is over, downloads are going to come again and you would have to do the entire process again.
Did we miss out anything in the list above? Let us know what we missed out by leaving a comment in the comments section below!