How to check which app is taking most of your storage on iPad
If you own an iPad and you only got one with the lowest storage option, it is important for you to constantly check out which application is taking the most of your storage, considering that the more loaded your device will be, the more you are to experience lag issues and performance drops.
The thing with owning Apple devices is that they come with settings and applications that help you make everything easy.
In this blog, we are going to list down some steps on how you can simply check out which application is taking the most storage in your device right now.
First Step: Open Settings
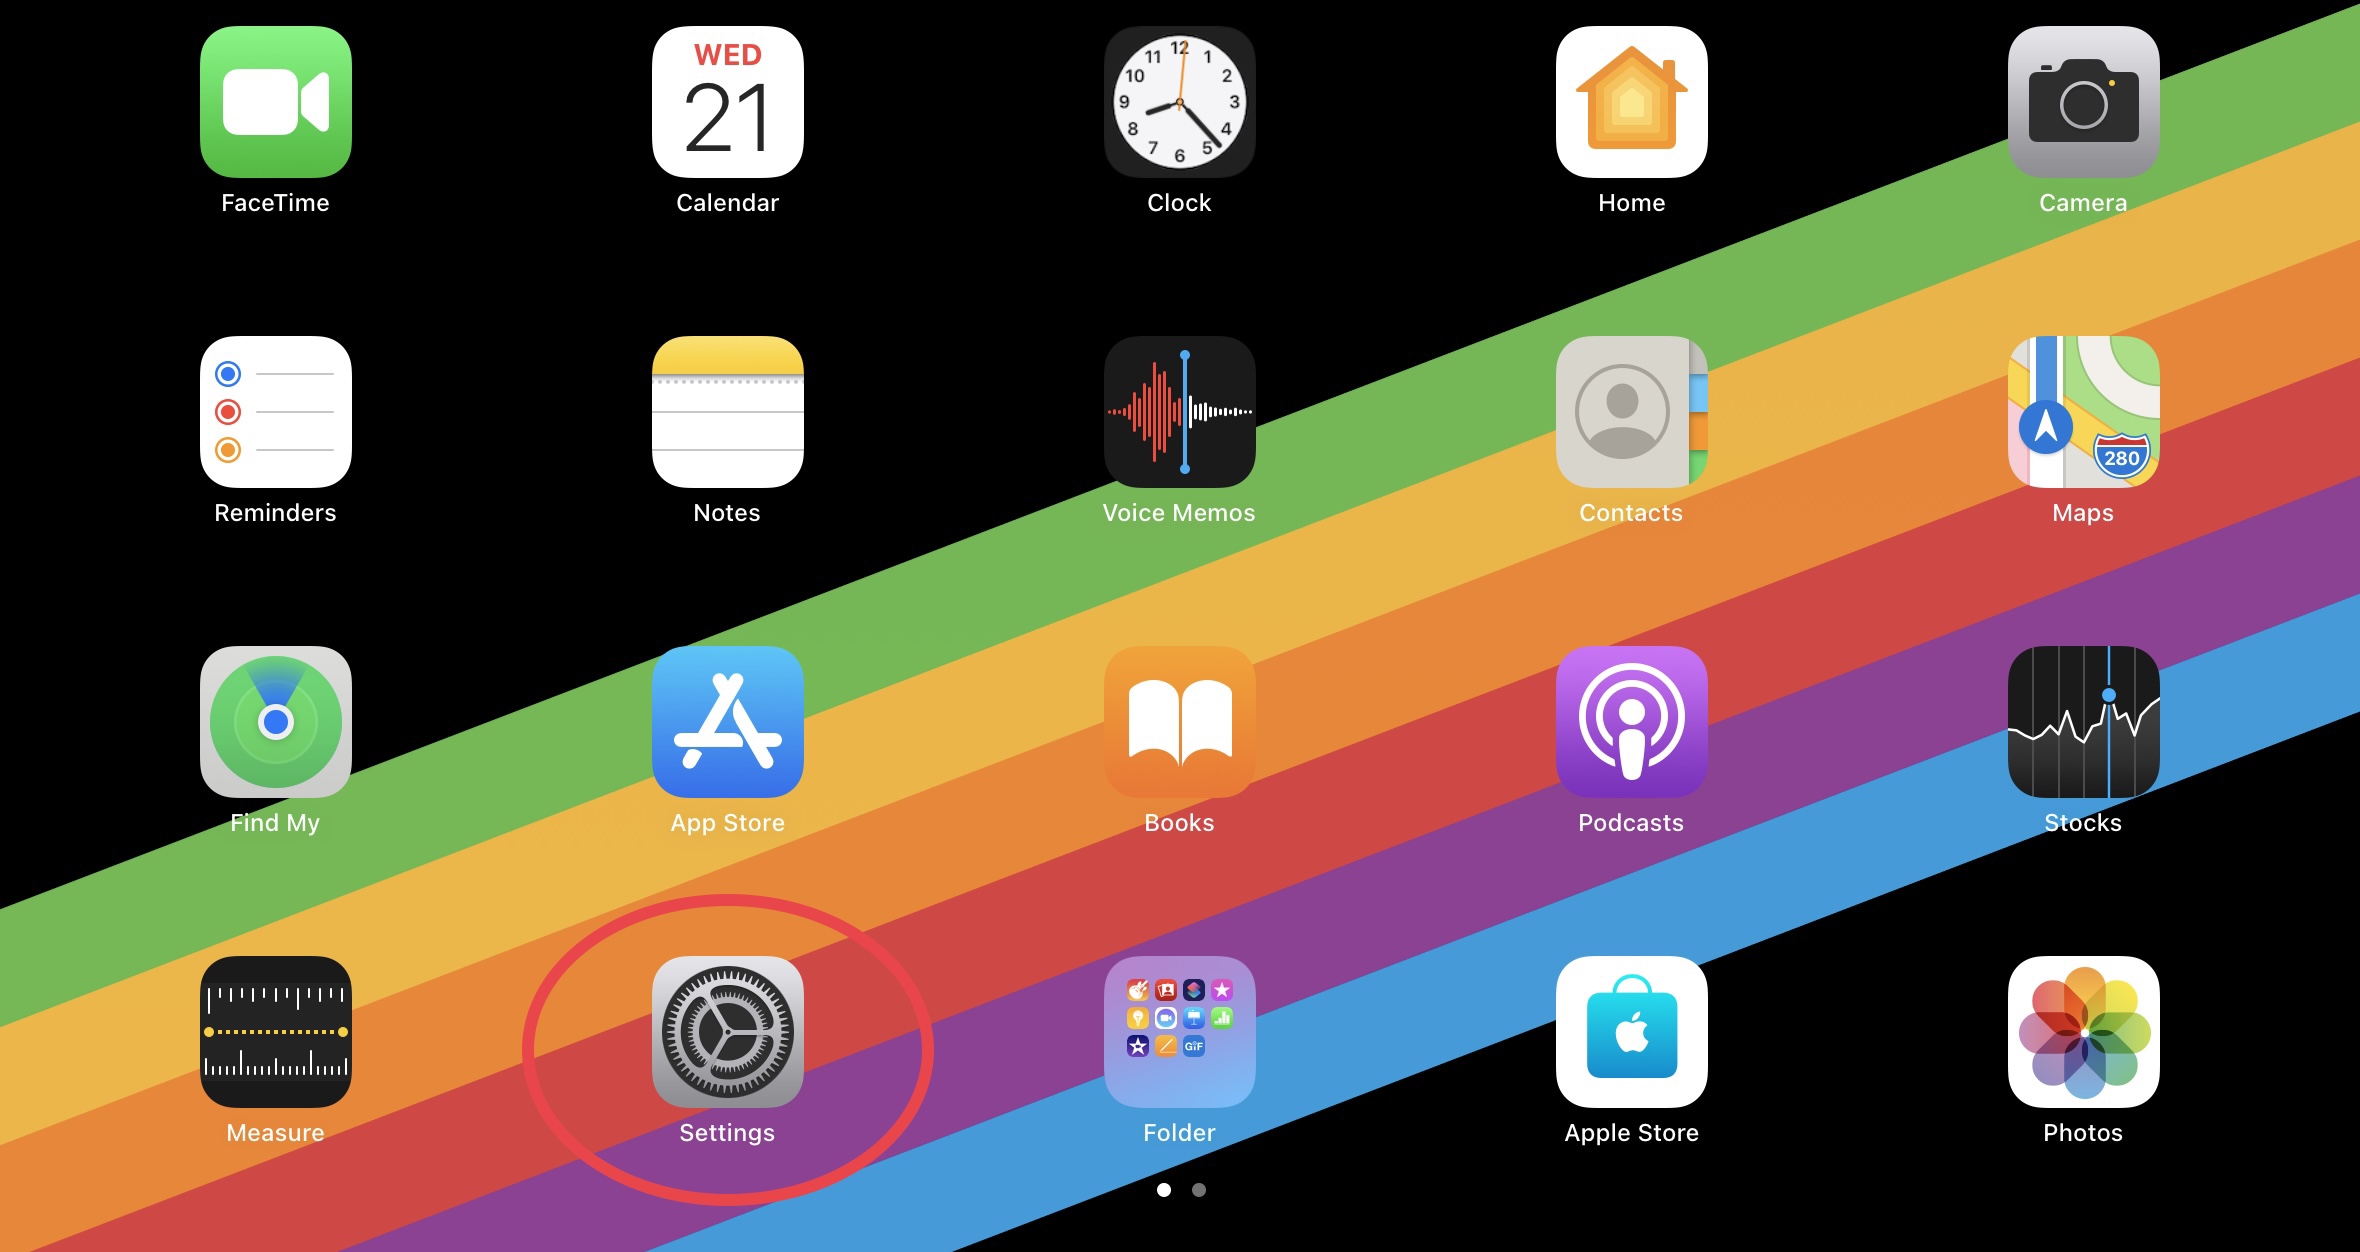
The first thing that you need to do in order to check out which setting is taking so much of your storage is to open settings. This can be found on your home-screen and should look like this:
Second Step: General
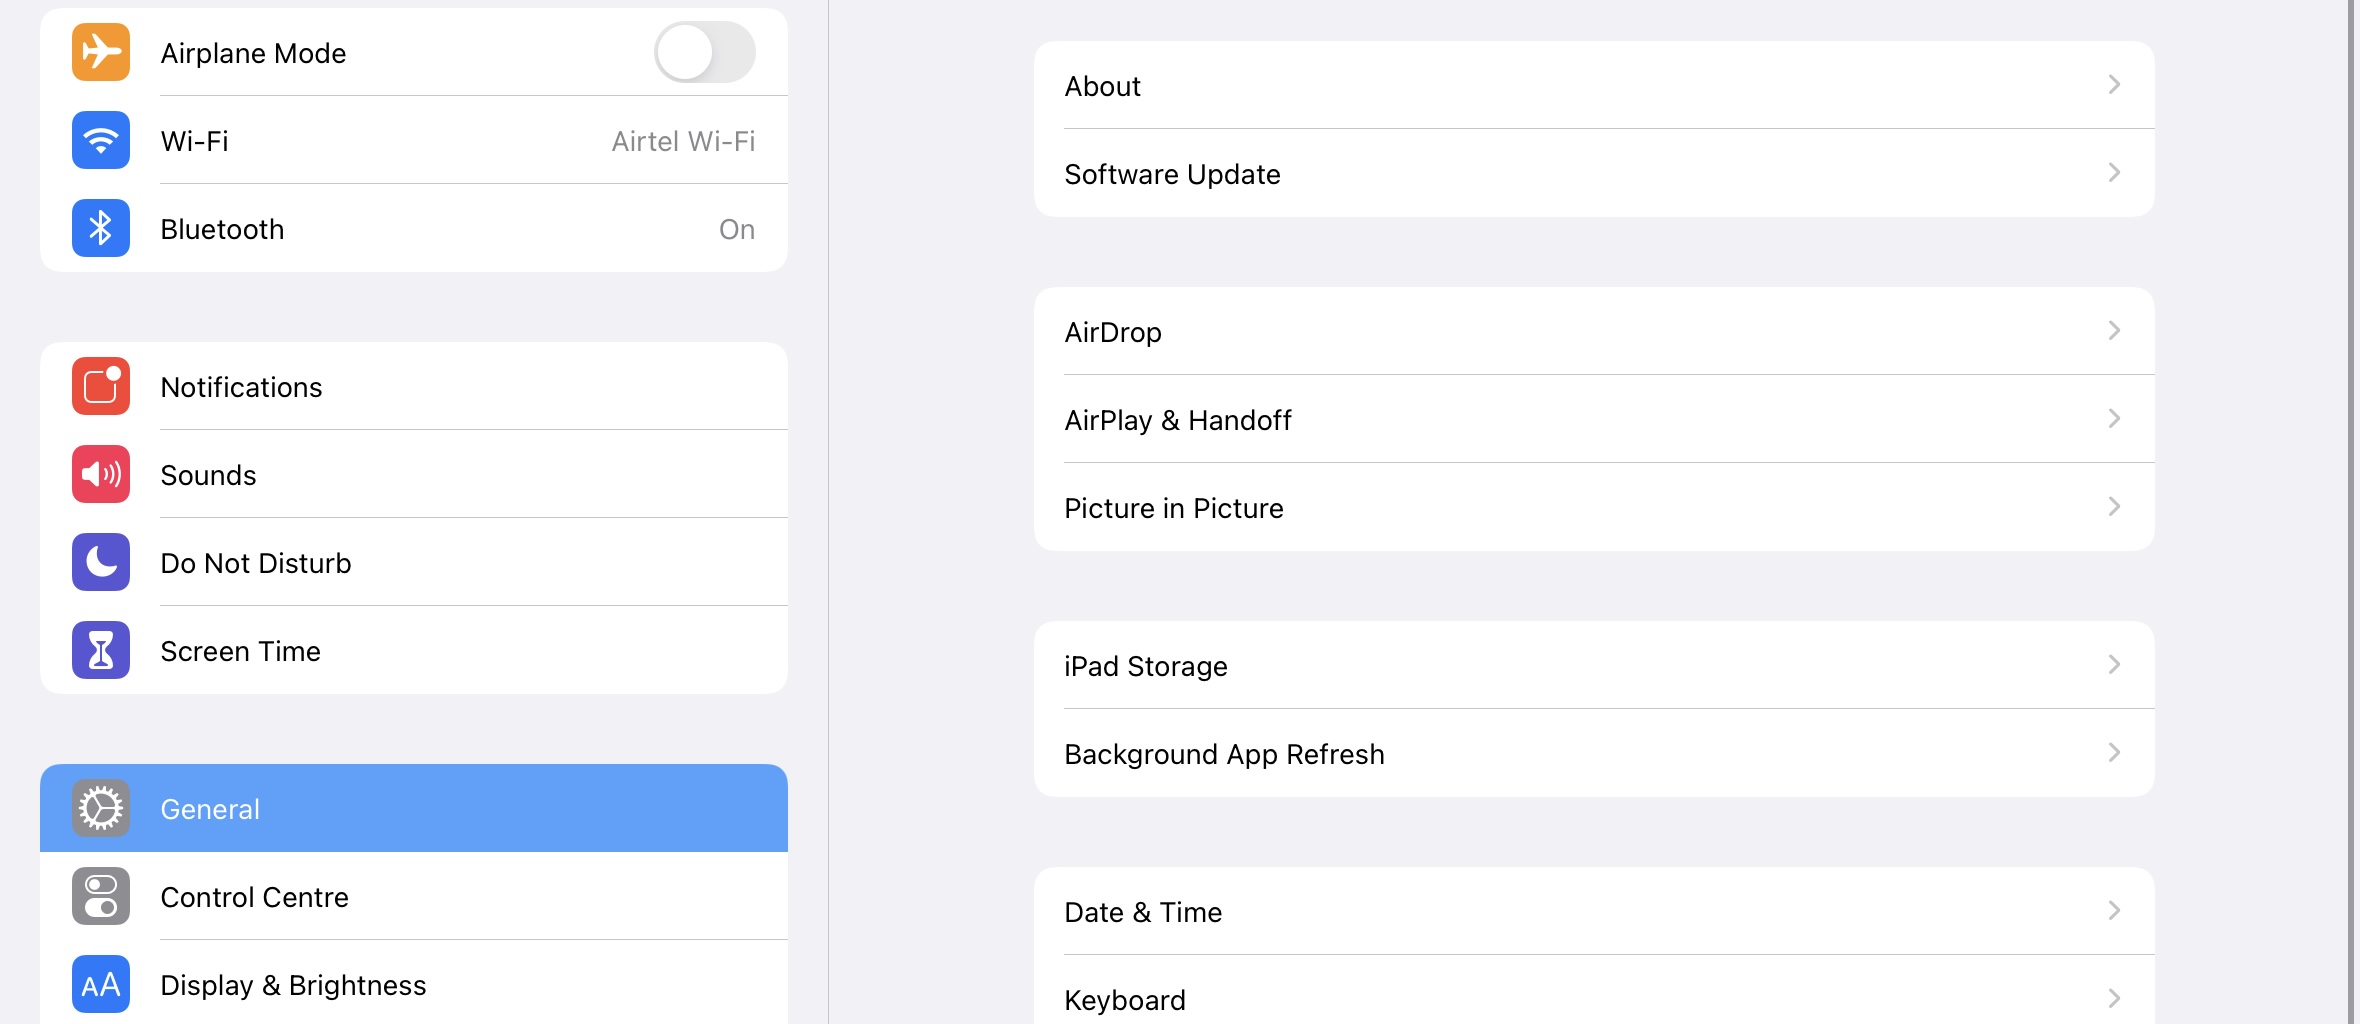
After you open Settings, the second thing that you would need to do is scroll down and find General. This will lead you to a new page, where you can check out the apps that are taking too much of space in your iPad.
Third Step: iPad Storage

The third thing that you need to do in order to check out the apps that are taking too much of your space is open where it says “iPad Storage”. Clicking this button will lead you to a new page where you can check out which apps are taking so much of your storage.
How to delete those apps?
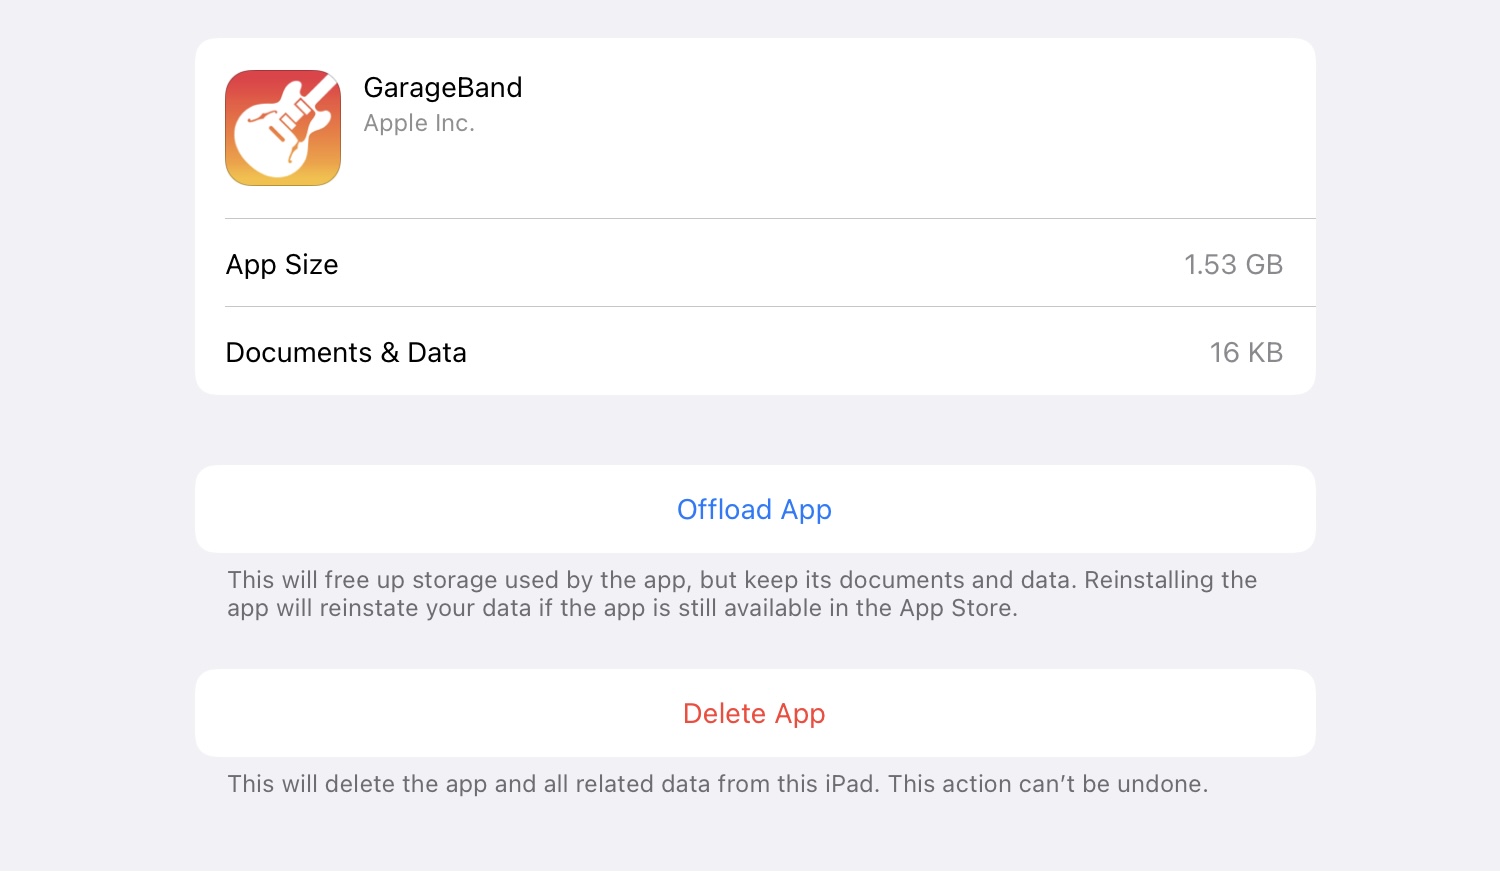
Once you have seen which applications are taking too much of your storage, you can delete them via the “iPad Storage” page or via the traditional long-hold and clicking “X” on your home-screen.

If you want to delete it via the “iPad Storage” setting, all you have to do is click on the application and click where it says delete. It should look like this:
If you want to do it the traditional way, all you have to do is go on your home-screen, find the app that you want to delete, long-press its icon, and click “X”, which will appear on the top of that button or if you have the much newer iOS, you will long-press it and click “Delete App”. It should look like this:
Did we miss out anything in the list above? Let us know what we missed out by leaving a comment in the comments section below!