How to use WordPress Backend Font Icons (Dashicons) on the Frontend custom menu
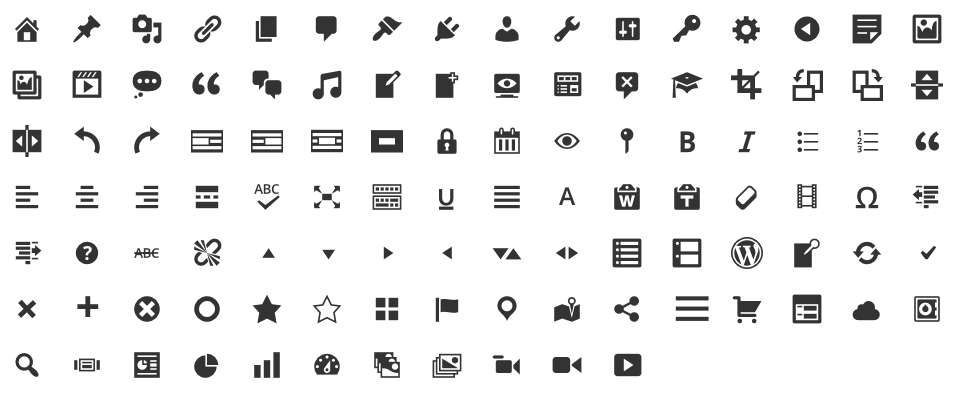
WordPress > 3.8 comes with a brand new admin interface built upon the “top secret” MP6 plugin. All graphic elements are HiDPI (retina) friendly by using the Icon Fonts (dashicons).
We are going to explain how you can use this awesome utility on your frontend category menu.
Read more: How to Harden your WordPress to Survive Hacking Attempts
Since wordpress 3.8 and above already included the icon font library, what you need to do is just load the css in the front end, insert some new CSS and update your custom menu settings.
Step 1: Load the dashicons CSS
Find and edit “function.php” in your “wp-content/themes/THEME_NAME” directory:
add_action( 'wp_enqueue_scripts', 'my_theme_name_load_css' );

function my_theme_name_load_css() {
wp_enqueue_style( 'dashicons' );
}
If your theme already included a theme stylesheet you can load the dashicons css as a dependency of your theme stylesheet:
add_action( 'wp_enqueue_scripts', 'yourthemename_scripts' );

function yourthemename_scripts() {
wp_enqueue_style( 'themename-style', get_stylesheet_uri(), array( 'dashicons' ), '1.0' );
}
Step 2: Using the icon
Now that you’ve loaded the dashicons css, let’s implement some cool icons! You can refer to the dashicons resource by Mel Choyce.
Let say you wanted to add the wordpress icon to your custom menu, Click the icon glyph, then click the “Copy CSS” link, it will open a dialog box containing the CSS code for that icon.
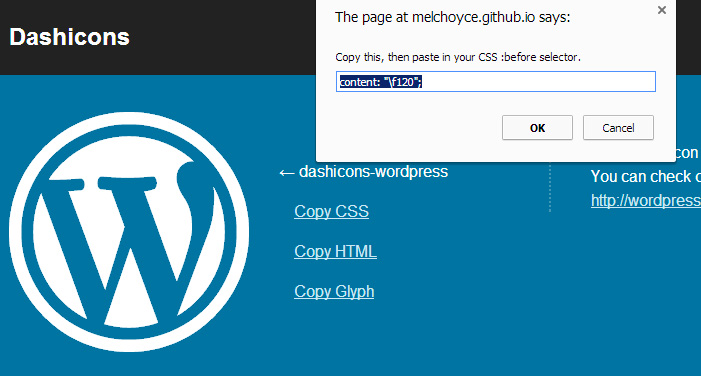
Now you have the icon CSS, all you need to do is apply this to the :before (or :after) pseudo class of the element you want to be prepended or appended by the icon:
.icon-wordpress:before {
  font-family: "dashicons"; content: "\f120";
}
Step 3: Update your custom menu settings
In the backend, navigate to Appearance > Menus, then click the “Screen Options” on the top right to make sure “CSS Classes” is ticked
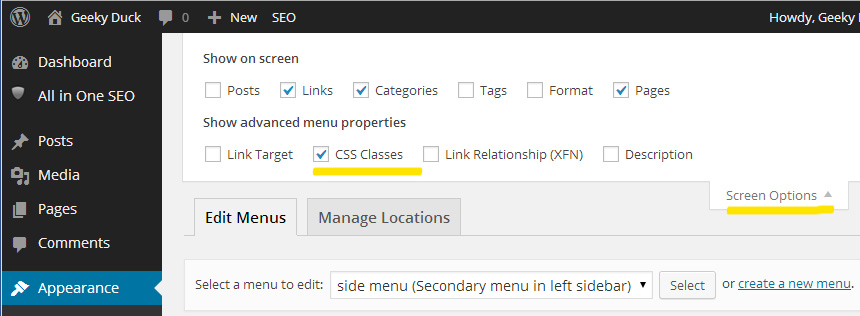
On the Menu Structure, set the CSS Classes to the class name where you define in Step 2

Result
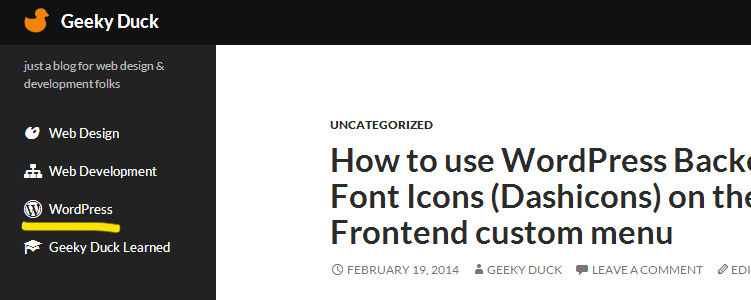
It’s easy huh? Now you have the awesome icon font for your custom menu. Apply the same steps to all your menu items and your blog would looks cool!