How to Setup AWS Ubuntu Nginx Instance
Let’s make it short and sweet. In this tutorial we are going to setup AWS Ubuntu NGINX instance. You will be able to launch your first AWS Ubuntu Instance by following the instructions below.
Step 1: Login to the AWS Console
Login or Signup a new account to the AWS Console here: https://aws.amazon.com/console/
Step 2: Choose EC2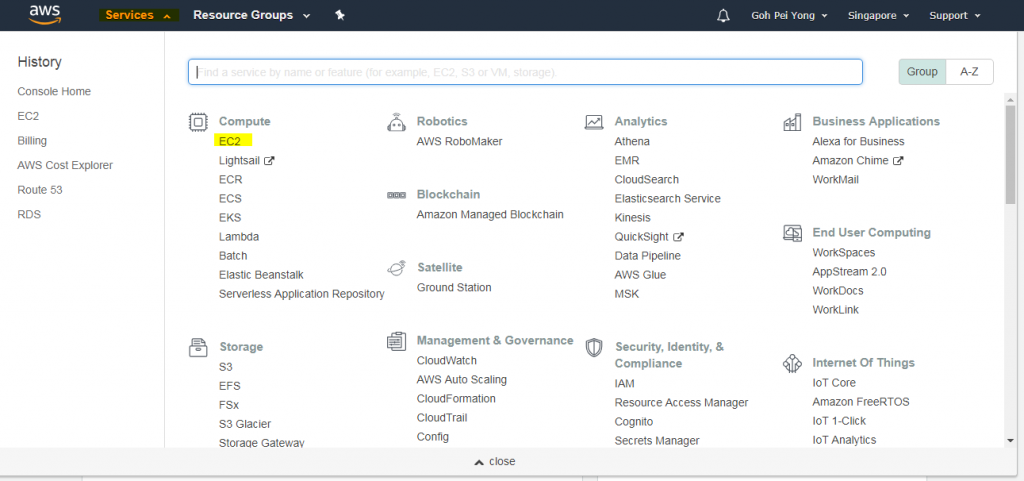
Step 3: Choose Instances in the left navigation and click the “Launch Instance ” Button
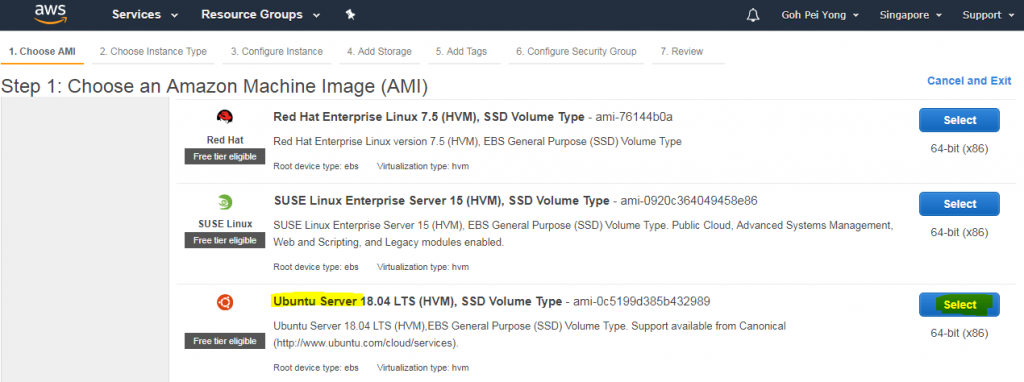
Step 4: Find Ubuntu Server and Click “Select”
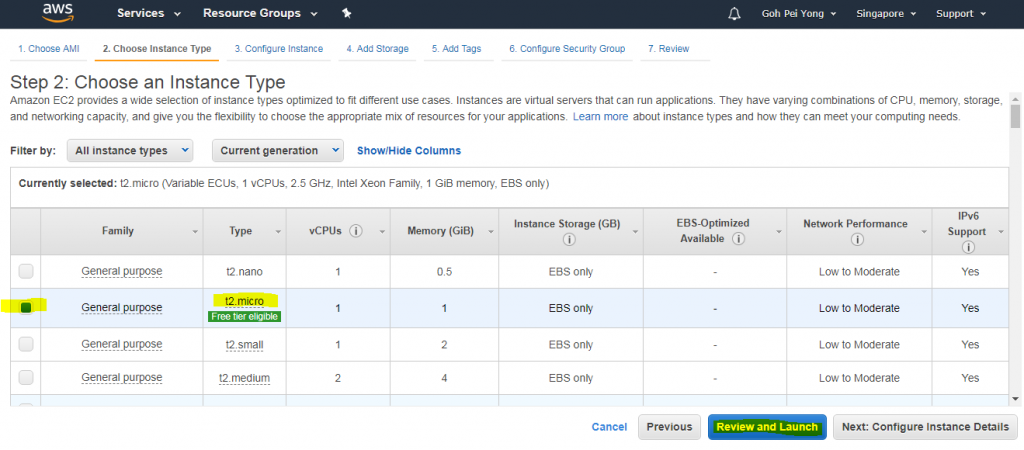
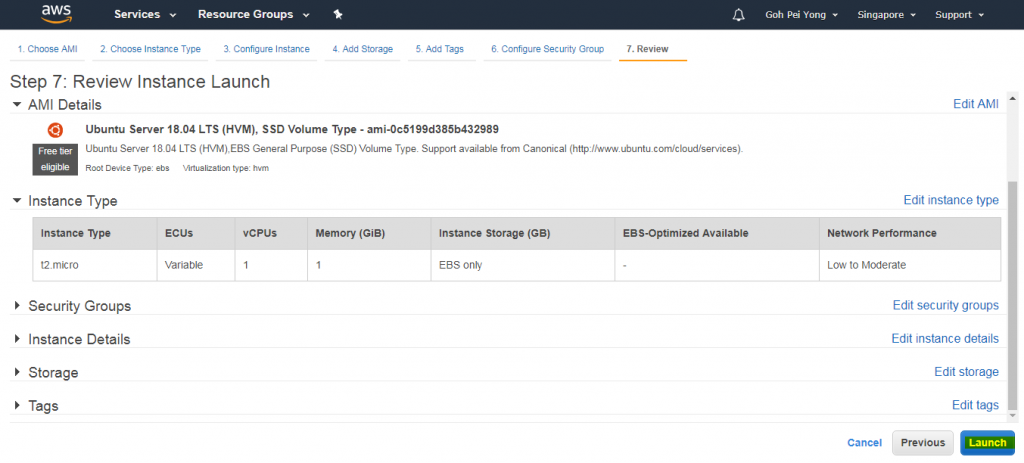
Step 5: Select the instance type and click “Review and Launch”
Choose t2.micro instance for testing purpose. Otherwise, Choose t2.small or medium if you are running a low traffic website. m4.large is a good start for medium-high traffic website.
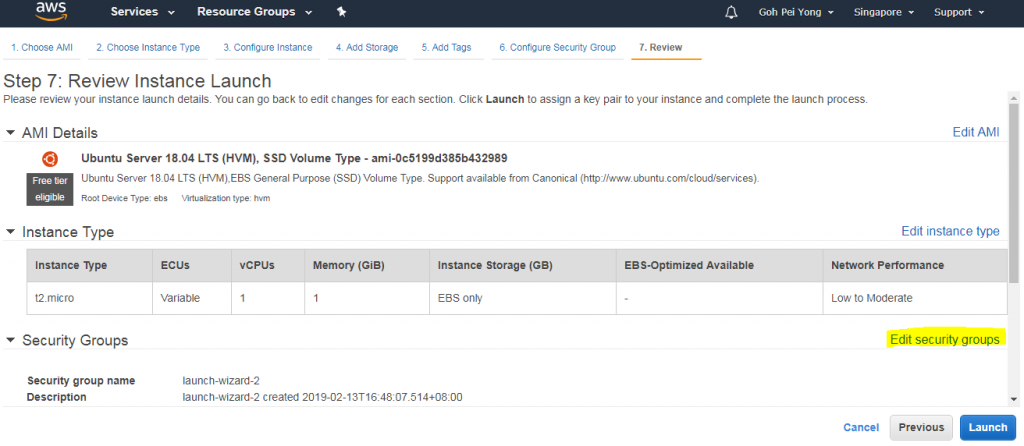
Step 6: Under Security Groups section, click “Edit Security Group”
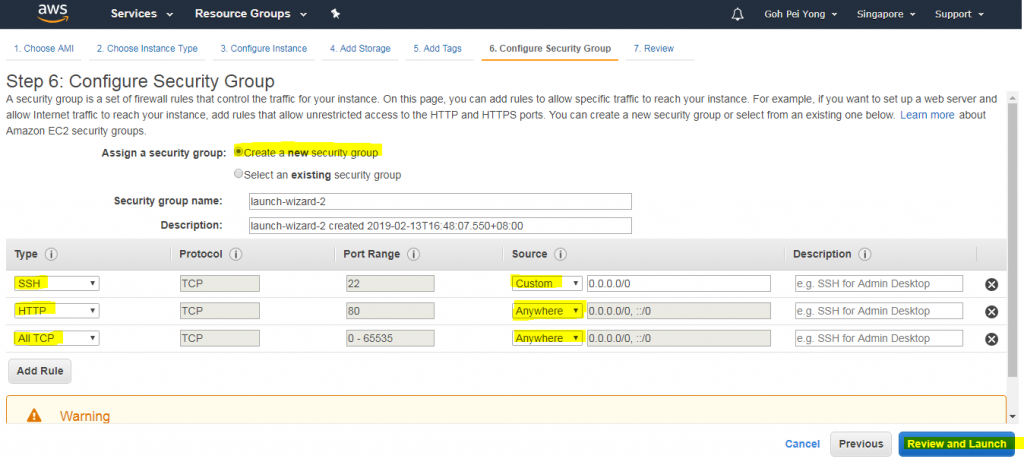
Step 7: Set Inbound rules for the security group
You can create a new security group or use an existing one. For this tutorial, I will allow All TCP inbound requests. For production site, you might want to consider only allow certain IP addresses for the inbound rules.
Set the SSH, HTTP and ALL TCP inbound rules as shown in the above image, click “Review and Launch” when done.
Step 8: Launch your instance
Step 9: Important- Download your Key Pair before you can Launch your instance
Before you can launch your instance, you must download the Key Pair. This Key Pair is not downloadable after you have launched your instance. Key in your desire key pair name and download it. You will need this key pair whenever you want to connect to your instance. You can’t connect to your instance if you loss your key pair.
Finally, Click “Launch Instances” and you instance will be launched in a few minutes.
Next: Install NGINX, PHP and MySQL to your AWS Ubuntu Instance
