How To Check System Specs On Windows 11
Windows 11 is now available to download if you are eligible for getting it.
If you are wondering how to check out your system’s specs, after you have upgraded your Windows to Windows 11, you can do a bunch of things.
Weird flex but okay.
Below, we are going to list down some things that you can do in order to check your System’s specs while you are using Windows 11.
First step:
The first thing that you need to do in order to see your PC’s specifications is open the Windows Settings, which you can do by simply pressing Windows + I on your keyboard. You can also type Settings on the search bar and simply hit the enter button.
Second step:
The second thing that you would have to do is click the “System” button, which should be present in the side bar.
Third step:
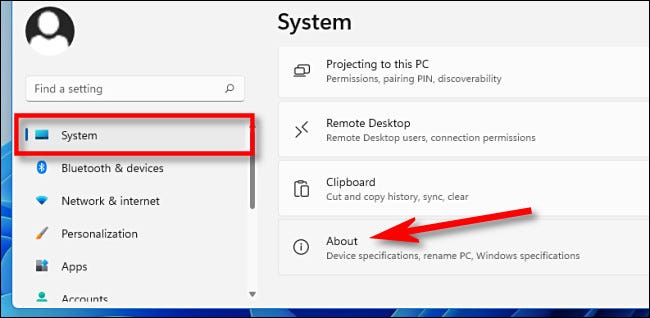
The third thing that you would have to do is select “About”, which you are going to find at the bottom of the list.
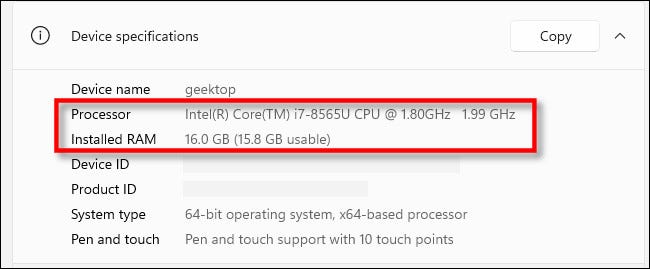
Fourth step:
The fourth thing that you would have to do is find where it says “Device Specifications”, which should be near the top of the screen. Once you click it, you are going to see all the specifications of your computer.

The CPU, RAM and type of OS you have is going to be listed there too!
Did we miss out anything in the list above? Let us know what we missed out in the steps list by leaving a comment in the comments section below!