How To Uninstall Extensions In Google Chrome | Works On Windows And MacOS
The good thing about using browsers these days is that we can add really useful extensions on them and make them more efficient for us.
But there are downsides of installing extensions on your browser.
One of the most common issues that users face when they have installed too many extensions in their browser is that it becomes really heavy and they start to show some slow loading signs along with many other problems. Not only that, but some extensions can exploit your privacy.
The good thing about installing is that you can always uninstall.
To help you remove some of the annoying extensions that you have installed in Google Chrome, we are going to list down some things that you can do in order to uninstall the extensions that are making your browser really slow.
How To Remove Or Uninstall Extensions In Google Chrome
First Step:
The first thing that you would have to do is open Chrome itself.
Second Step:
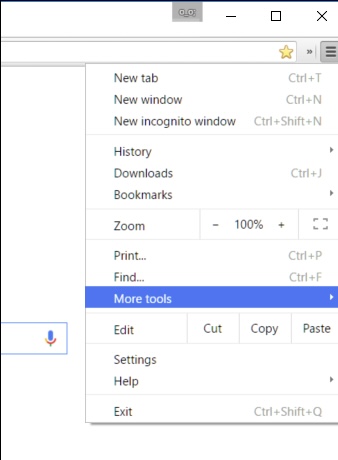
The second thing that you would have to do is click the menu button, which should be located on the top right corner of your screen.
Third Step:
The third thing that you would have to do is point to “More Tools”.
Fourth Step:
The fourth thing that you would have to do is wait until a new menu appears and select “Extensions”.
Fifth Step:
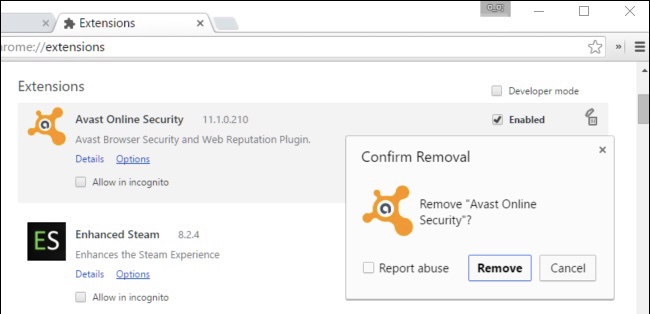
The fifth thing that you would have to do is wait until Chrome brings you to a page where all your extensions are present.
Sixth Step:
The last thing that you would have to do is select the extension that you want to get rid of and hit the “Garbage” button that is present right next to them. Doing that will simply remove the extension permanently from your Chrome. If you wish to bring them back, you can just install them again.
Did we miss out any step in the list above? Let us know what we missed out by leaving a comment in the comments section below!


